
스팀 최근 평가
없음
스팀 모든 평가
스팀앱 평가
2. 가격 (KRW)
갱신:
3년 전
원가:
₩ 10,500
세일:
-
판매가:
₩ 10,500
6. 게임 소개
6.1 동영상


6.2 소개
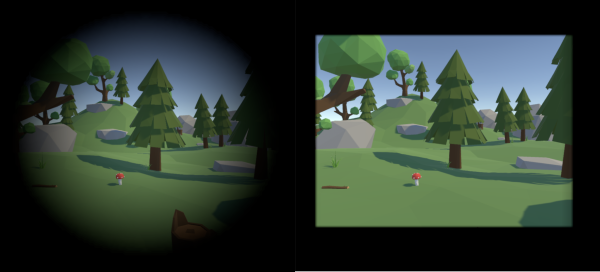
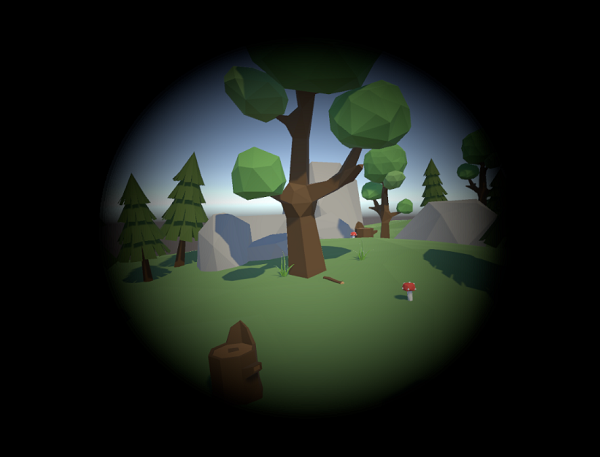
"OVR Locomotion Effect" is an overlay tool that aims to reduce VR motion sickness.
1. Launch a SteamVR game you want to test.
2. Launch "OVR Locomotion Effect" from SteamVR Home > Library > BROSE ALL > OVR Locomotion Effect.
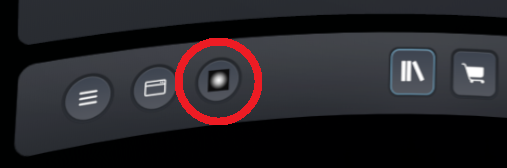
3. Click the bottom icon on the SteamVR dashboard.
4. Click "Demo" from sidebar.
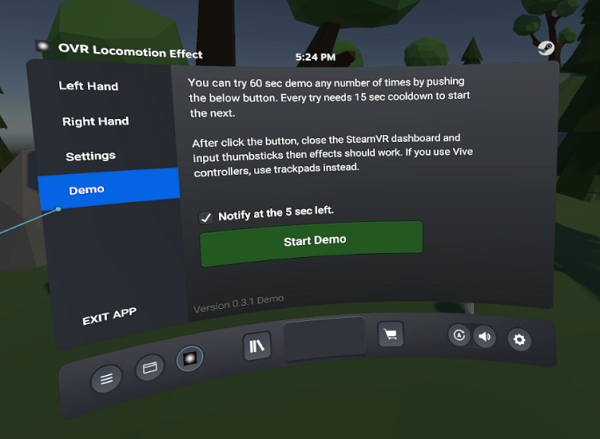
5. Setting an effect you want to try. You can check actual effect visual by preview button.
6. Click "Start Demo" button then 60 sec timer starts.
7. Close the SteamVR dashboard and input thumbsticks then effects should be displayed. You can try all features on any VR game with an overlay.
8. After 60 sec, additional 15 sec cool time starts. After the cool time finished, you can run the demo again.
Notes: 60 sec time limit restricts displaying effects only that is displayed during the SteamVR dashboard has closed. You can change settings or check preview any time regardless the time limits. More details of this tool, please check below description.
If you want to disable effects all-time, check off the "Enable" checkbox on the SteamVR dashboard.
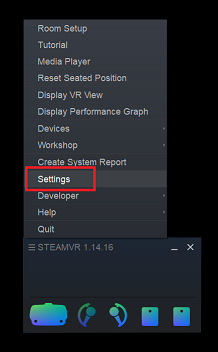
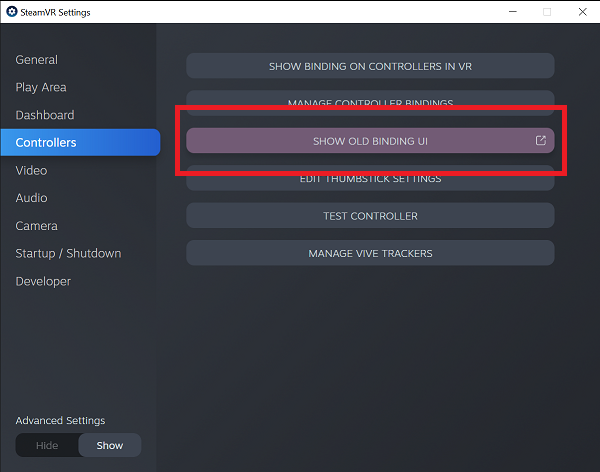
1. Open SteamVR setting.
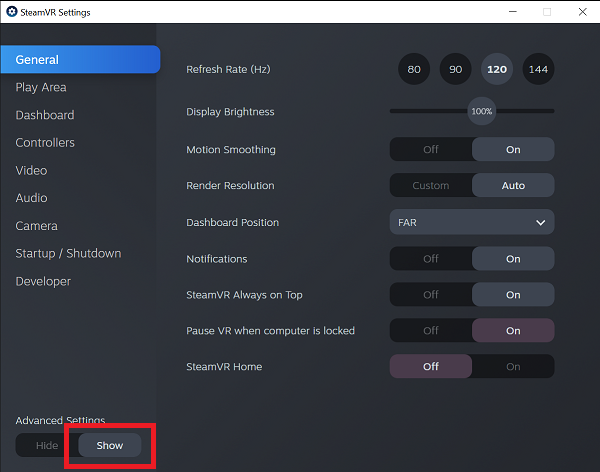
2. Toggle Advanced Settings to "Show". This is for setting bindings to overlay applications.
3. Click "Controllers" -> "SHOW OLD BINDING UI".
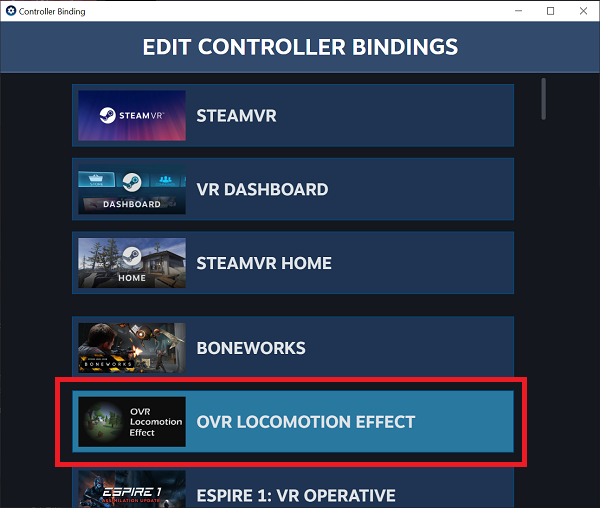
4. Choose "OVR LOCOMOTION EFFECT" from the title list.
5. Click "Edit".
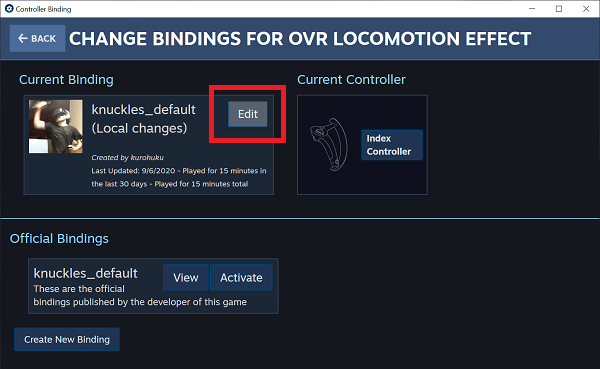
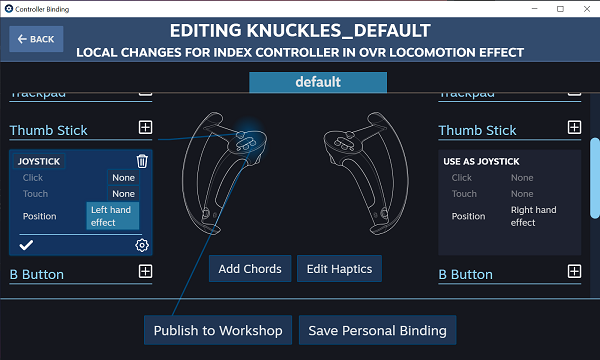
6. The controller binding screen is displayed, then select any buttons or triggers and bind one of the below actions. Save as personal binding.
Points
- Display anti motion sickness effect to HMD according to thumbstick input.
- Customize effects via SteamVR dashboard.
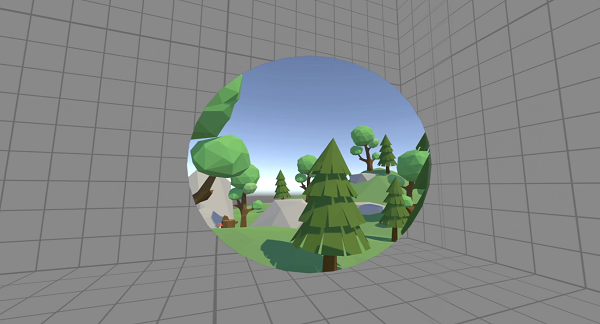
- Two effect types shadow and room.
- Set an effect to the left and right thumbsticks individually.
- Input customization via SteamVR Input.
- Assign effects to any triggers or buttons in addition to thumbsticks.
Free Demo
Please try a free demo before purchase. Only difference to the product version is that the demo has time limit to each run. You can test the overlay with any actually VR game in your library. Check whether it reduces motion sickness for you.How to use the demo?
1. Launch a SteamVR game you want to test.
2. Launch "OVR Locomotion Effect" from SteamVR Home > Library > BROSE ALL > OVR Locomotion Effect.
3. Click the bottom icon on the SteamVR dashboard.
4. Click "Demo" from sidebar.
5. Setting an effect you want to try. You can check actual effect visual by preview button.
6. Click "Start Demo" button then 60 sec timer starts.
7. Close the SteamVR dashboard and input thumbsticks then effects should be displayed. You can try all features on any VR game with an overlay.
8. After 60 sec, additional 15 sec cool time starts. After the cool time finished, you can run the demo again.
Notes: 60 sec time limit restricts displaying effects only that is displayed during the SteamVR dashboard has closed. You can change settings or check preview any time regardless the time limits. More details of this tool, please check below description.
Can I use on the Quest?
Quest is not supported as a native app but you can use this tool with connecting PC via Oculus Link or Virtual Desktop.Disable effects
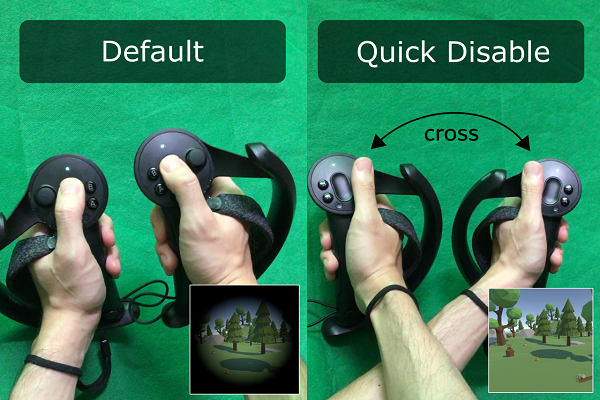
Effects are temporarily disabled during the left and right controllers are crossing. Please fold your arms if you want to disable effects such as when you are controlling item inventory.If you want to disable effects all-time, check off the "Enable" checkbox on the SteamVR dashboard.
Startup
You can launch OVR Locomotion Effect when the SteamVR launch by setting "Startup / Shutdown" menu in the SteamVR settings.SteamVR Input
You can assign effects to any inputs like triggers or buttons via the SteamVR Input by the below way.1. Open SteamVR setting.
2. Toggle Advanced Settings to "Show". This is for setting bindings to overlay applications.
3. Click "Controllers" -> "SHOW OLD BINDING UI".
4. Choose "OVR LOCOMOTION EFFECT" from the title list.
5. Click "Edit".
6. The controller binding screen is displayed, then select any buttons or triggers and bind one of the below actions. Save as personal binding.
- LeftHandEffect : Display left hand effect.
- RightHandEffect : Display right hand effect.
- LeftHandEffectDigital : Display left hand effect. This is shown on some buttons setting.
- RightHandEffectDigital : Display right hand effect. This is shown on some buttons setting.